
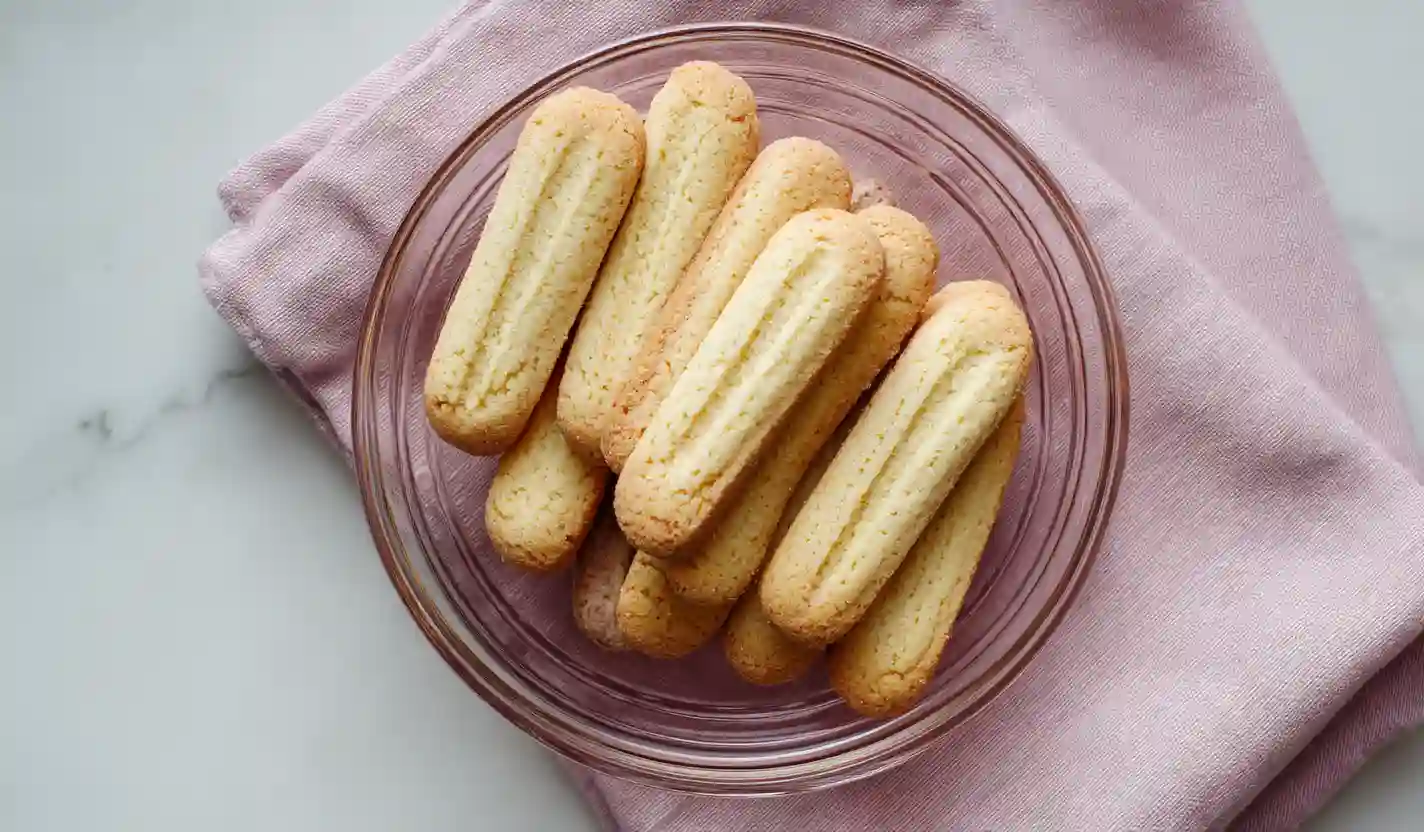
There’s something quietly special about baking ladyfingers from scratch.
They feel light and delicate, yet deeply satisfying like the kind of homemade touch that turns a simple dessert into a cozy, nourishing tradition.

On busy days or slow weekends alike, these cookies bring a sense of calm to the kitchen.
They’re soft, airy, and just structured enough to soak into espresso and cream, making them perfect for balanced comfort baking and thoughtful dessert prep.
Whether you’re planning a family-style tiramisu, a budget-friendly dessert project, or simply craving a gentle homemade treat, these ladyfinger cookies are a simple, rewarding place to start.
Ingredients You’ll Need
Every ingredient here plays a role in creating that signature light texture nothing heavy, nothing fussy, just a well-balanced baking list that feels approachable and comforting.
Pantry & Fresh Staples
- 3 large eggs (free-range) – Eggs provide structure and a subtle protein-rich backbone to these airy cookies.
- 2/3 cup granulated sugar – Sweetens gently without overpowering, keeping the cookies light and balanced.
- Pinch of salt – A small touch that brings harmony to the sweetness.
- 1/4 tbsp vanilla extract – Adds warmth and that classic homemade bakery aroma.
- 1 cup all-purpose flour, sifted – Keeps the texture soft and smooth.
- 2 tbsp cornstarch – Helps create a tender crumb that’s perfect for soaking.
- 1 tsp lemon zest (optional) – A bright, fresh note that keeps things feeling light and refined.
- Powdered sugar, for dusting – That final cozy bakery finish.
These simple ingredients come together in a way that feels both traditional and modern ideal for balanced comfort cooking and intentional dessert prep.
How to Make It
Prepare a Warm, Ready Kitchen
Adjust your oven rack to the middle position and preheat to 350°F.
Line two cookie sheets with baking paper, setting the stage for an easy, stress-free baking experience that fits beautifully into a cozy afternoon routine.
Set Up for Smooth Piping
Fit a large piping bag with a 1/2-inch round tip.
Rolling the bag open and standing it upright in a tall glass keeps things tidy and calm small prep steps like this make baking feel more relaxed and family-friendly.
Separate the Eggs with Care
Place the yolks in a large bowl and the whites into a stand mixer fitted with a whisk attachment.
This step is key to creating the airy texture that makes these cookies feel light, delicate, and surprisingly satisfying.
Whip the Yolks Until Pale and Fluffy
Using a hand mixer, whip the egg yolks with half of the sugar until pale, thick, and fluffy.
This gentle whipping builds a soft structure that supports the cookies without weighing them down.
Add Flavor Gently
Beat in the vanilla extract, then fold in the lemon zest if using.
These subtle flavors keep the cookies feeling fresh and balanced perfect for a lighter dessert approach.
Whip the Egg Whites to Stiff Peaks
Whip the egg whites on medium-high speed until fluffy, then slowly add the remaining sugar.
Continue whipping until stiff peaks form. This step is crucial strong peaks help the cookies hold their shape and bake up beautifully, making them ideal for make-ahead dessert plans.
Fold Everything Together Lightly
Using a silicone spatula, gently fold the whipped egg whites into the yolk mixture.
Take your time here this careful folding preserves air, keeping the batter light and the final cookies soft and delicate.
Incorporate the Dry Ingredients
Whisk together the flour, cornstarch, and salt in a small bowl.
Slowly fold the mixture into the batter until just combined, creating a smooth, lump-free texture that pipes easily and bakes evenly.
Pipe with Confidence
Transfer the batter to the prepared piping bag.
Pipe fingers about 3 inches long and 1 inch wide, leaving space between each. Holding the bag at a slight angle and lifting straight up at the end helps create clean, classic shapes.
Bake Until Lightly Golden
Dust generously with powdered sugar, then bake for 12–15 minutes, until puffed and just lightly golden.
Bake the second tray the same way, filling your kitchen with that warm, comforting bakery aroma.
Cool Completely
Allow the cookies to cool completely on the tray at room temperature.
This resting time helps them set properly, making them sturdy enough for layering and soaking later.
Cozy Tips & Serving Ideas
- Perfect for Make-Ahead Desserts: These cookies store beautifully, making them ideal for meal prep-style dessert planning or weekend baking sessions.
- Diabetic-Friendly Adjustments: Swap part of the sugar for a baking-friendly alternative if needed, keeping sweetness gentle and balanced.
- Gluten-Free Option: Use a trusted gluten-free all-purpose flour blend to keep the texture light and inclusive.
- Low-Carb Inspired Pairing: Serve smaller portions layered with lightly sweetened mascarpone for a more mindful dessert approach.
- Budget-Friendly Baking: Homemade ladyfingers cost less than store-bought and deliver better texture perfect for feeding a crowd without stress.
- Family Dessert Night: Let kids help with piping or dusting powdered sugar for a cozy, hands-on kitchen moment.
- Storage Tip: Store in an airtight container at room temperature for up to 3 weeks, making them ideal for planned desserts and special occasions.
Final Cozy Paragraph
These homemade ladyfinger cookies are one of those quiet kitchen wins light, airy, and deeply comforting in the most understated way. They bring a sense of intention to dessert making, whether you’re layering tiramisu for a family gathering or simply preparing something thoughtful ahead of a busy week.
With simple ingredients and a gentle process, they fit beautifully into balanced comfort baking proof that homemade treats can feel both nourishing and special, one soft cookie at a time.

ladyfinger cookies for tiramisu
Equipment
- Stand mixer with whisk attachment For whipping egg whites to stiff peaks
- Hand mixer For whipping egg yolks with sugar
- Large piping bag with 1/2-inch round tip For piping classic ladyfinger shapes
- Two baking sheets Line with baking paper/parchment
- silicone spatula For gentle folding to keep batter airy
Ingredients
- 3 large eggs, free range
- 2/3 cup granulated sugar
- 1 pinch salt
- 1/4 tbsp vanilla extract
- 1 cup all purpose flour, sifted
- 2 tbsp cornstarch
- 1 tsp lemon zest (optional)
- powdered sugar, for dusting
Instructions
- Adjust oven rack to the middle position and preheat to 350 F. Line two cookie sheets with baking paper.
- Fit a large piping bag with a 1/2-inch round tip. Stand the bag upright in a tall glass or jar so it can be filled hands-free.
- Separate the eggs. Place yolks in a large bowl and whites in a stand mixer fitted with a whisk attachment.
- Using a hand mixer, whip egg yolks with half the sugar until pale and fluffy. Beat in vanilla extract. Fold in lemon zest if using.
- Whip egg whites on medium-high until fluffy, then slowly add remaining sugar while whipping. Continue until stiff peaks form.
- Gently fold the whipped egg whites into the yolk mixture using a silicone spatula, taking care not to deflate the batter.
- Whisk together flour, cornstarch, and salt. Add to the batter gradually, folding gently until lump-free.
- Transfer batter to the piping bag. Pipe fingers about 3 inches by 1 inch, leaving 1 inch between cookies. Dust generously with powdered sugar.
- Bake 12 to 15 minutes, until puffed and lightly golden. Bake the second tray the same way.
- Cool completely on the tray at room temperature. Store in an airtight container at room temperature up to 3 weeks.